
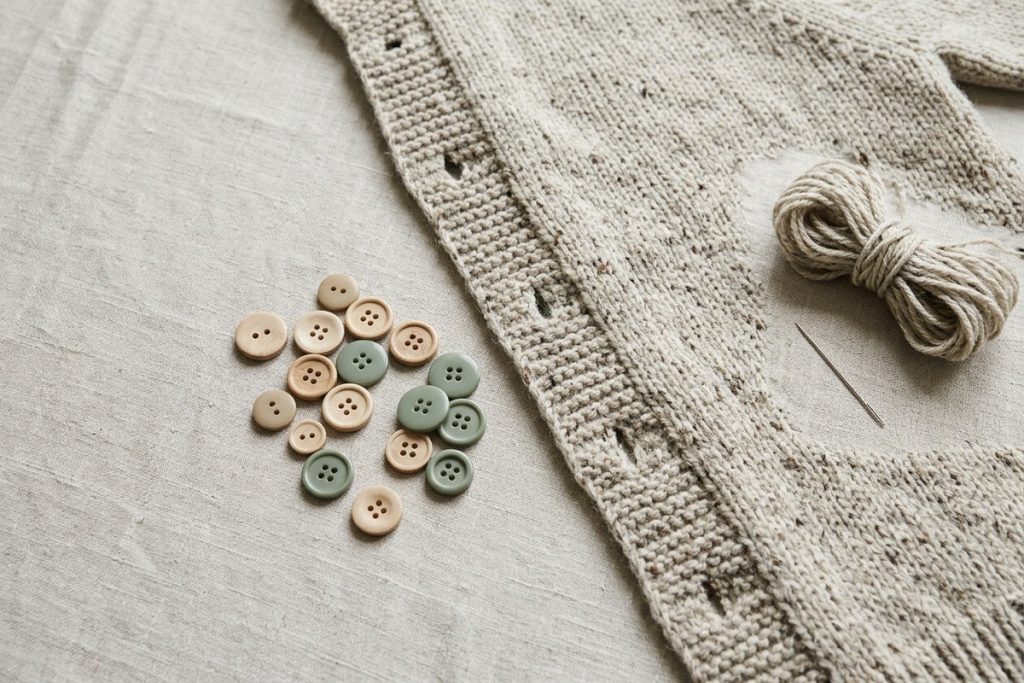
The knitting is finished. The ends are woven in. Then you lay the buttons along the front and realize the ones you liked in the shop look too small against the stitches.
Or they look right, but their weight pulls the edge down.
Buttons are a small purchase after weeks of knitting, yet they affect how the finished piece hangs. Color matters, of course. But before settling on a match for the yarn, check whether the button works with the fabric you have made.
What Should You Check Before Buying Buttons for Knitting?
Keep your pattern nearby, but make the final decision using the blocked fabric.
- Weight: The button should not visibly drag down the band.
- Fit: It should pass through the hole with gentle resistance, without stretching nearby stitches.
- Back: Look for smooth holes or a smooth shank loop that will not snag the yarn. Quick answer: Choose buttons for knitting by testing them against the finished fabric, not by diameter alone. A suitable button should pass through the buttonhole without forcing it, stay closed when the fabric moves and sit without pulling the band out of shape. Lightweight wood or resin is a useful starting point, but test a sample before buying the full set.
- Clearance: The fastened fabric needs room beneath the button.
- Care: The yarn and button must tolerate the same cleaning method.
- Quantity: Count the finished buttonholes and allow for a spare or two.
If you are still knitting, work a buttonhole into your swatch. That small extra step gives you something useful to take shopping.
Should You Choose Buttons Before or After Blocking?
Shortlist buttons while you knit, then confirm the fit after washing and blocking the swatch or garment according to the yarn instructions.
Blocking can change a button band. A hole that grips firmly straight off the needles may relax after washing. Another may settle into a smaller, neater opening.
Let the fabric dry fully before testing. Lay it flat without pinning the buttonhole open.
Try more than one hole, too. Hand-worked buttonholes can vary slightly, particularly where the tension changed or the band was picked up along an edge.
If your pattern specifies a diameter, use that as the starting point. It is not a substitute for checking the actual fabric.
How Can You Tell Whether a Button Is Too Heavy?
Support the garment as it will be worn and watch what happens to the band.
A button can look fine on a cardigan lying on a table because the table carries its weight. Lift the fabric and the problem becomes easier to see: the attachment point dips, the band rolls or the stitches beneath the button open up.
For a first check, hold a sample at the intended position while supporting the fabric above it. If it looks promising, baste it in place and try the garment on. For a long row of buttons, testing several gives a more useful picture than testing only one.
There is no single weight limit that suits every knit. A firm, densely worked band behaves differently from loose stockinette, even when both use the same yarn.
Wood and resin are worth considering when weight is a concern. Metal is not automatically unsuitable, but a solid metal button deserves a closer test. Chunky yarn does not automatically mean the fabric can carry heavy hardware, either. A loose chunky knit may stretch quite easily.
What Size Buttons Fit Knitted Buttonholes?
The right size passes through without strain and stays fastened when the band moves.
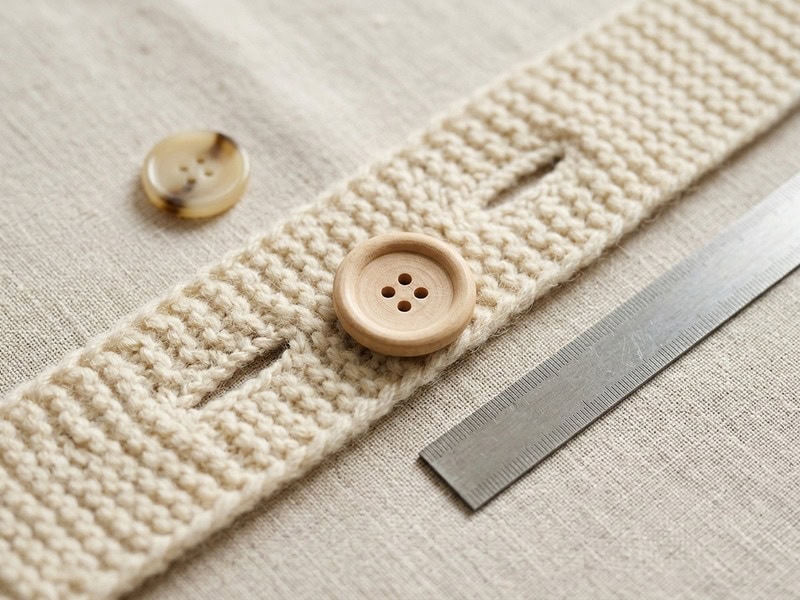
Measure the relaxed opening, then test the proposed button. Do not stretch the hole along a ruler and treat that length as your target diameter.
Thickness matters as well. Two buttons can both measure 20mm across, yet a thick domed button may be much harder to push through than a thin, flat one.
Use this fit test:
- Pass the button through the hole without pulling hard on the surrounding fabric.
- Let the hole settle around it.
- Move the fabric gently in the directions it will stretch during wear.
- Unfasten it again and check whether the hole returns to shape.
If the button slips back through with little resistance, try a different size or profile. If fastening it distorts the stitches, do not force it.
Our button size guide explains diameter measurements and ligne sizes for comparing product listings. Use those measurements to narrow down the options, then test the fit on your knitting.
A larger button can help with a slightly loose opening. It will not solve a badly stretched band or a garment that is too tight across the front.
Are Sew-Through or Shank Buttons Better for Knitting?
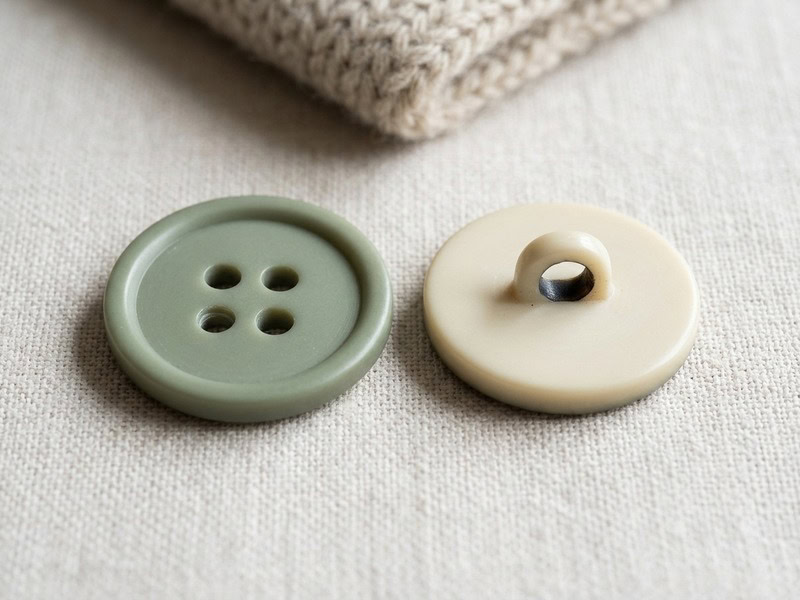
Both can work. Choose the back that gives the fabric enough room while keeping the button stable.
| Back type | Where it can be useful | What to check |
|---|---|---|
| Two-hole sew-through | Simple closures where visible stitching suits the design | Smooth holes and enough room for the sewing thread |
| Four-hole sew-through | Flat buttons with attachment stitches worked across two pairs of holes | Avoid pulling the button tight against the knit |
| Shank | Thick bands or decorated faces without visible sewing holes | A smooth loop, suitable clearance and no excessive tipping |
A shank lifts the button face away from the fabric. That can help a thick band sit underneath it, but a tall shank may make the button wobble on a thin knit.
A sew-through button can also have clearance. Leaving a little slack while sewing, then forming a short thread shank beneath it, keeps the button from clamping the band flat.
Run a fingertip over the underside before attaching either type. A rough rim or burr around a hole is worth finding now, rather than after it catches a strand of yarn.
Our sew-through vs. shank button comparison takes a closer look at the two constructions. For knitting, pay particular attention to the space beneath the button.
Which Button Materials Work With Knitted Fabric?
Choose the material for the fabric and its care routine, then consider the finish.
Wood
Wood suits textured wool and quiet, neutral color palettes. It is worth considering when a large-looking button needs to remain relatively light.
Our natural wooden buttons come in two-hole and four-hole styles, with sizes from 10mm to 25mm. Compare a sample against the blocked band before choosing the full set. A broad rim may look balanced against a textured stitch pattern; a smaller, simpler shape can sit more quietly on fine knitting.
Check the surface, hole edges and care instructions. Wooden buttons vary in finish, so do not assume that every style tolerates soaking or machine washing.
Resin
Resin offers a wide choice of colors and shapes, including small, flat styles for lighter knits.
For a project with small buttonholes, our 11mm colorful resin buttons are one option to test. They come in triangle, square and recessed-hole shapes with sew-through backs.
Check the shape as well as the stated size. A corner can pass through a knitted opening differently from a rounded edge.
Look beyond the front face, too. A thick resin button can still be bulky, and narrow sewing holes may be awkward if you intend to use yarn rather than thread.
Metal and Decorated Buttons
Metal, faux pearl and rhinestone styles can suit a knitted jacket or an accent closure. Test the complete button, not just the base material: raised decoration adds bulk and may catch on fuzzy yarn.
If the yarn has a halo, brush a spare strand gently across the edges and settings. Snagging on a sample is a reason to choose another design.
How Do You Sew Buttons Onto Knitwear Without Puckering?
Support the attachment area and leave enough space for the fastened band.
- Arrange the finished garment. Let the fronts meet naturally without stretching them into position. Mark each button location through its buttonhole with removable thread or a suitable marker.
- Choose the sewing thread. Use a smooth, strong thread that passes easily through the holes. Matching yarn may suit the design, but check that repeated passes do not abrade or split it.
- Catch several knit loops. Work through a small area of the band rather than repeatedly loading one strand of yarn.
- Keep the fabric relaxed. For a sew-through button, leave the clearance needed for the opposite band. A temporary spacer can help.
- Add support if needed. A small, smooth backing button on the inside can spread the pull on a loose or delicate band.
- Secure and test. Finish the thread neatly, fasten the button and check that the fabric sits without a dimple.
A backing button is useful, but it is not compulsory on every project. A firm band may need no extra support. Check the inside for comfort as well, especially at a neckline or cuff.
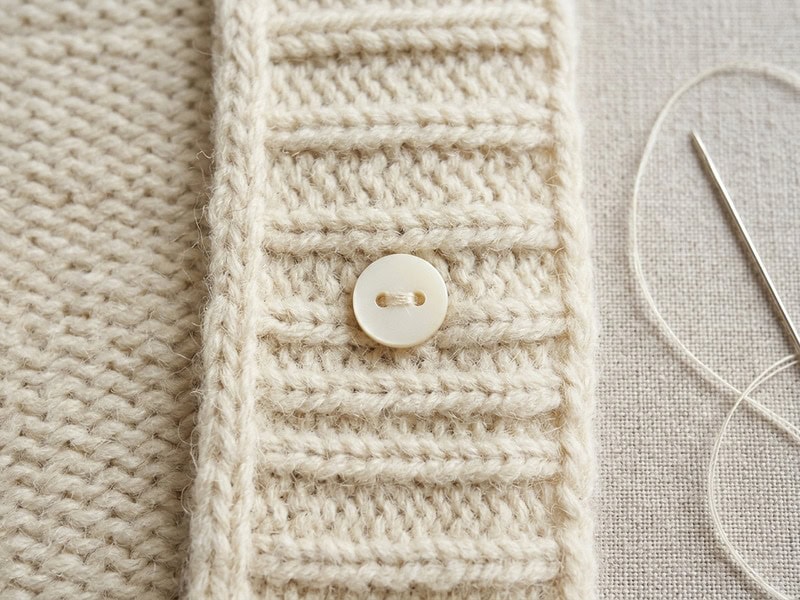
If you need a refresher on the stitches, our step-by-step guide to sewing on a button covers both sew-through and shank styles. On knitted fabric, tightening the thread should secure the button, not draw the surrounding stitches into a dimple.
What If the Button Band Still Gapes?
Check when and where the gap appears before changing the buttons.
If the button comes undone, its size or shape may be part of the problem. If it stays fastened but the fabric opens between closures, look at button spacing, band stability and garment fit.
Try the garment on rather than judging it flat. Does the gap appear only when you sit down or reach forward? Is one section under tension while the rest hangs comfortably?
Heavier buttons will not correct that tension. Depending on the project, the answer may involve reinforcing the band, adjusting a closure or revisiting the fit.
How Should You Wash Knits With Buttons Attached?
Follow the yarn’s care instructions and check that the buttons can tolerate the same treatment.
If they cannot, choose a different button or plan for removal before washing. Decide this before sewing on the full set.
Avoid pressing directly over decorative buttons. After washing, reshape the band gently and dry the garment as directed for the yarn. Check the sewing thread while the piece is laid out; a loose attachment is easier to repair before the button goes missing.
Frequently Asked Questions
Can I use ordinary sewing buttons on knitting?
Yes. There is no requirement to buy a knitting-only button. Check weight, smoothness, clearance and fit against the knitted fabric.
Are larger buttons better for chunky knitting?
They may look more balanced, but test them. Stitch density and buttonhole construction matter as much as yarn thickness.
Can I sew buttons on with leftover yarn?
Sometimes. The yarn needs to pass through the holes without damage and tolerate the friction of fastening. Use suitable sewing thread if the yarn is bulky, loosely spun or easily split.
Should I buy buttons before starting the project?
Buying a sample early is helpful, particularly if the button is central to the design. Confirm it on a washed and blocked buttonhole swatch before committing to the full set.
How many spare buttons should I keep?
One or two are useful for most personal projects. Label them with the garment name and keep them with the yarn-care information.
Where Can You Find Buttons for Knitting?
Start with the buttonholes you have made. For a neutral finish, compare the sizes and backs in our wooden button range. For smaller openings where color is part of the design, look at the 11mm resin styles.
You can also browse the full Shancco button collection if neither suits the project. There is little point choosing the right color if the button pulls the band down or slips through the hole.
Before ordering a full set, note the diameter recommended in your pattern, the finished buttonhole size and the thickness of the band. A close-up photograph of the fabric beside a ruler is useful when asking about a suitable style.
Can You Order Buttons for Knitting in Bulk?
Shancco offers wholesale and bulk orders for knitwear labels, yarn shops and knitting-kit suppliers.
For an inquiry, include the preferred material, diameter, back type and quantity. If the buttons will be packed into kits, specify how many each project needs, including spares. Confirm sample suitability and care requirements before placing a production order.
Ask about wholesale buttons for knitting kits and knitwear, or email [email protected].