
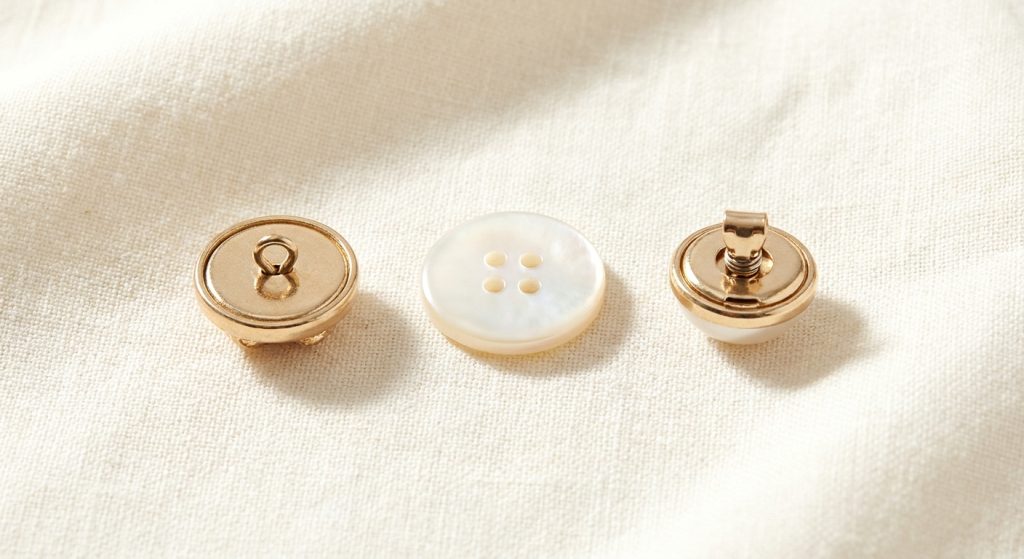
Quick answer: the back of a button is what really decides how it goes on and where it works best. A shank button hides a small loop underneath, and you sew through that loop — the face stays smooth and the button sits a little proud, which is why it does so well on thick knits, coats and decorative buttons. A sew-through button is the familiar kind with two or four holes on the front; you stitch straight through them, it lies flat, and it goes on fast by hand or machine, so it’s the go-to for everyday shirts, blouses and craft projects. No-sew button covers don’t involve a needle at all — they just clip over the buttons already on your garment, so you can change the look in seconds and unclip them before a wash. Rule of thumb: reach for a shank on heavier or decorative buttons, a sew-through for practical everyday closures, and covers when you want a quick, reversible refresh with no sewing.
We tend to judge a button by its front, but it’s the back that quietly does the work — it sets how you attach the button, how high it sits and what it’s actually good for. In practice you’ll run into three types: shank buttons, sew-through buttons and no-sew button covers. They don’t behave the same way, and getting the back right saves you a fair bit of fuss and gives you a tidier result. Below, we walk through how each one works, the fabrics and projects it suits, and how to pick between them.
What Are the Three Ways a Button Attaches?
Nearly every button you’ll pick up sorts into one of three groups, and it comes down to the back:
- Shank button — a loop (the shank) on the back; you sew through the loop, not the front.
- Sew-through button — two or four holes on the front; you stitch through the holes, flat to the fabric.
- No-sew button cover — a decorative cap that clips over a button you already have; no sewing at all.
We’ll take them one at a time below, then line them up side by side.
What Is a Shank Button?
Instead of holes on the front, a shank button has a small loop molded into the back. Your thread goes through that hidden loop a few times, which keeps all the stitching tucked underneath and leaves the decorative face smooth and unbroken. That little loop also lifts the button off the fabric a touch — just enough room for heavy material to sit underneath without bunching up. It’s the reason shanks have always been the natural pick for coats, chunky knits and thick wool.
They’re also the answer for sculpted, decorative buttons, where a couple of holes drilled through the front would spoil the design. Our vintage brass shank buttons, for instance, are rounded, carved metal-alloy buttons in an antique brass-tone finish, while our cherry blossom flower buttons sit on a shank so the white resin petals and gold-tone center stay clean and do all the talking.
Ideal for: coats, wool, chunky knitwear, cardigans, and any decorative metal or flower button where you’d rather leave the front unbroken.
What Is a Sew-Through Button?
A sew-through button is the everyday workhorse: two or four holes on the front that you stitch straight through, so the button ends up flat against the fabric. It’s easily the most common back you’ll meet — quick to sew on by hand or machine, hard-wearing, and simple to swap if one goes missing. Two holes are plenty for lighter garments, while four holes add a second pair of anchor points, handy on things that get buttoned all day like shirts and jackets.
They’re just as at home on plain, practical closures as they are on fun decorative touches. Our colorful buttons, for example, use a flat two- or four-hole sew-through back, so they go on fast and lie flush on knitwear, baby clothes and craft projects.
Best for: shirts, blouses, everyday knitwear, baby and kids’ clothes, and DIY crafts that call for a flat, secure, machine-friendly finish.
What Are No-Sew Button Covers?
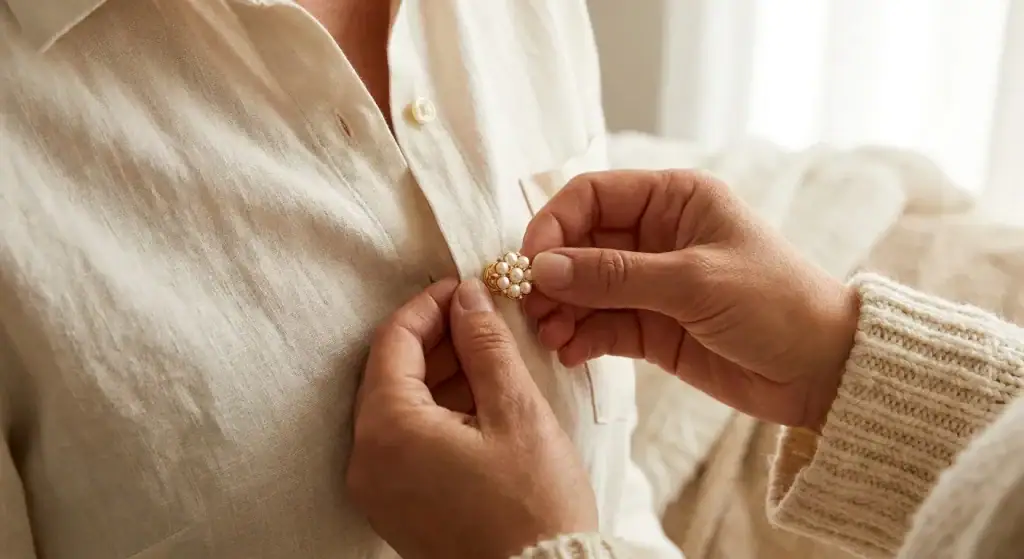
No-sew button covers are little decorative caps with a clip or snap on the back. You don’t replace anything — you button your garment as normal, then clip a cover over each fastened button so the design shows on the front and the plain button disappears underneath. Since nothing gets stitched or cut, they come right back off again: put them on for an evening out, take them off before the next wash.
With no needle involved, they’re a gift if sewing isn’t your thing, if you just want to dress up a shirt for one night, or if you’d like to shuffle a single set of designs across several garments. Our no-sew button covers come in faux pearl, flower, enamel and rhinestone styles on a gold-tone or silver-tone metal-alloy base, and they clip over most standard shirt buttons.
Here’s why they win people over:
- No needle, no experience needed — they clip on in seconds, even if you’ve never sewn a button in your life.
- Completely reversible — wear them for one event, then unclip before the wash.
- One set, lots of looks — move a single set between shirts, blouses and jackets.
- Kind to your clothes — nothing’s cut or stitched, so the garment underneath stays exactly as it was.
Best for: dressing up shirts and blouses for an event, quick reversible restyles, and anyone after a no-sew, no-damage upgrade.
Shank vs Sew-Through vs No-Sew Covers: A Quick Comparison
| Feature | Shank button | Sew-through (2 or 4-hole) | No-sew cover |
|---|---|---|---|
| How it attaches | Sewn through a loop on the back | Stitched through 2 or 4 front holes | Clips over an existing button |
| Front of button | Smooth, no visible holes | Holes and stitching visible | Decorative cap hides the button |
| How it sits | Slightly raised (proud) | Flat against the fabric | On top of the buttoned button |
| Best fabrics | Thick knits, coats, wool | Shirts, blouses, everyday knits, crafts | Any shirt with standard buttons |
| Sewing needed | Yes | Yes | No |
| Removable without unpicking | No | No | Yes, clips on and off |
Which Button Back Suits Which Fabric or Project?
Treat the table below as a starting point, then bend the rules for whatever look you’re going for.
| Fabric or project | Best button back | Why |
|---|---|---|
| Dress shirts & blouses | Sew-through (2 or 4-hole) | flat, neat and machine-friendly |
| Everyday knitwear, baby & kids’ clothes | Sew-through | lightweight, quick and secure |
| Chunky knits & wool coats | Shank | the raised loop leaves room for thick fabric |
| Decorative metal or flower buttons | Shank | keeps the carved or flower face clean |
| Dressing up a shirt for an event | No-sew cover | reversible, no sewing, protects the buttons |
| No sewing skills or a rented garment | No-sew cover | clips on and off in seconds |
How Do You Attach Each Type?
Sewing on a shank button
- Bring a knotted, double thread up through the fabric from the back.
- Pass the needle through the shank loop, then back down through the fabric.
- Repeat several times until secure, wind the thread around the stitches beneath the button to form a neat base, then knot off underneath.
Sewing on a sew-through button
- Bring the needle up through one hole from the back of the fabric.
- Pass it down through the opposite hole, keeping a little tension so the button sits flat. For a four-hole button, repeat across both pairs to form parallel bars or a cross.
- Stitch through several times, then finish with a few small stitches on the back and knot off.
Clipping on a no-sew cover
- Fasten your garment so each button is done up.
- Hold the cover over a buttoned button, design facing out, and press so the clip grips behind the button.
- Check it sits flat and secure; to remove, gently unclip and lift it off.
How Do I Choose the Right Button Back?
Start with two questions: what’s the fabric, and what’s the button for? Working with heavy fabric or a sculpted, decorative button? Go with a shank so it sits proud and the front stays clean. After a fast, flat, hard-wearing closure for everyday shirts, knitwear or crafts? A sew-through is your friend — bump up to four holes for anything that gets buttoned a lot. Not keen on sewing, or you want a look you can add and peel off at will? That’s exactly what no-sew button covers are for. Plenty of makers simply keep all three in the tin: shanks for coats and statement pieces, sew-through buttons for everyday jobs, and covers for quick, reversible restyles.
Shop by Button Back
Once you’ve settled on a back, here’s where to dive into our collection.
For shank buttons — coats, knits and decorative styles
- Vintage brass shank buttons — carved, openwork metal-alloy buttons in a warm antique brass-tone finish; 6 per pack, enough to refresh a cardigan or jacket.
- Cherry blossom flower buttons — white resin petals around a gold-tone center, about 15mm, in packs of 10 or 20 with a needle and thread included.
For sew-through buttons — everyday shirts, knits and crafts
- Colorful buttons — smooth 11mm resin buttons with a flat two- or four-hole back, in many single colors plus mixed packs; 10 per pack for cardigans, baby clothes and DIY projects.
For no-sew button covers — a quick, no-sew restyle
- No-sew button covers — faux pearl, flower, enamel and rhinestone designs on a gold-tone or silver-tone base that snap over your existing buttons in seconds, no sewing required.
Frequently Asked Questions
What’s the difference between shank and sew-through buttons? A shank button has a loop on the back that you sew through, so the front stays smooth and the button sits slightly raised. A sew-through button has two or four holes on the front and stitches flat against the fabric.
Which is better for thick fabric — shank or sew-through? Usually a shank. The loop lifts the button off the surface, leaving room for heavy material to sit underneath without puckering.
Can I swap a shank button for a sew-through one? Often, yes — as long as the size still fits your buttonhole. Just know the look shifts: a sew-through sits flatter, a shank sits raised. Either way, match the size to your buttonhole and fabric weight.
Do no-sew button covers work on any shirt? They fit most standard shirt and blouse buttons. Very large, very small or oddly shaped buttons may not hold a cover as neatly, so it’s worth checking the size of your existing buttons first.
Which button back is easiest for beginners? No-sew covers, since there’s no sewing at all. If you are sewing, two-hole sew-through buttons are the simplest to attach.
Where to Buy
Whatever back your project calls for, you’ll find it in our collection. Browse the full button collection for shank and sew-through styles, or the no-sew button covers for a no-sew upgrade — then pick the back that matches your fabric and your comfort with a needle.
Get in Touch
Not sure which button back suits your project? Our customer service team is happy to help you choose.
- Email: [email protected]
- Phone: +86 158-8823-7906
- Address: No. 163, Hanbu Road, Qiaoxia Town, Yongjia County, Wenzhou City, Zhejiang Province, China, 325106